It is important to understand what period is best to sow seeds. It depends on several factors. Among them, the main one is the region of residence. The warmer the area, the earlier you can plant seedlings in open ground, and, accordingly, sow seeds.

When to plant tomatoes for seedlings?
Between the processes of planting seeds and planting seedlings should take about two months, during which sprouts will sprout from the seeds. You can start working with seeds in February for those who live in warm regions, and in March for residents of the northern part of the country.
To plant seeds in the ground, it is necessary to take into account weather information for the near future. They need to be sown two months before the end of spring frosts - then tomato bushes will better take root in the open ground and will be able to bear fruit well.
Another key point is the landing site. You need to navigate the weather only when planting sprouts in a field or garden. In the presence of a greenhouse, this is insignificant, and seedlings can be engaged in mid-winter. The main thing is to provide the sprouts with a good thermal and light regime.
Selection of seeds in the store
In order to choose the right and suitable seeds, you need to pay attention to the parameters of the future bush and the conditions for its best growth.
Tomato bushes can be tall, medium in size and undersized. They differ in care, so you should choose them if possible growth.
Tall bushes of tomatoes can reach a height of two or more meters. They are grown both in open ground and in greenhouse conditions. A prerequisite is the presence of support. This is due to the fact that during the period of fruit ripening, the weight of tomatoes can reach 20 or 30 kilograms from one bush. If the plant is not provided with proper support, it can break and then the crop will disappear.
Tall bushes bear fruit longer and yield much earlier. Fruits can be harvested from mid-summer to late autumn. This variant of plants is suitable for those who have a small area for planting plants, and a large crop is required.
The average size of the bushes has most varieties. They reach one and a half meters at the peak of growth and do not require as much care as tall bushes. However, their productivity is much less.
Low-growing varieties are the most popular among the population. They do not grow above a meter, are compact enough and easy to care for. They can be grown at home, for example, in a box on the balcony. They don’t need support, since their trunks are strong enough to support up to 8 kilograms, and that’s how much they get from one bush.

Another selection parameter is a characteristic of the fetus itself. You need to choose what exactly tomatoes are for. Large and meaty varieties are excellent for salads, and small tomatoes, for example, cream, are ideal for preservation. Fans of sweet varieties of tomatoes are advised to read the following article.
The color of the tomatoes may also vary. There are red, orange and black varieties. They are all different in taste, so you need to choose based on personal preferences.
You can also choose by price category. There are cheaper and more expensive varieties of seeds. According to statistics, expensive seeds germinate better and give a larger crop. Among cheap products, empty seeds are often found that do not sprout in the ground.
If you rely on productivity, then choose the appropriate varieties, for example, tomato seeds of Siberian selection have proven themselves well.
In addition, the stores have seeds that have undergone processing - they can be planted immediately, or you can use independently prepared seeds for sowing.
Seed preparation
In order for the harvest to be rich and pleasing to the eye, it is necessary to make a careful selection of seeds before planting. This process selects all low-quality seeds, leaving only the strongest. Most people buy ordinary seeds, and conduct training at home, as there is nothing complicated about it:
- The first step in this process is seed calibration. To do this, you need salted water. In half a liter of ordinary water you need to add a teaspoon of table salt and mix thoroughly until completely dissolved. Then, tomato seeds are placed in the resulting solution and left for several minutes. After the lapse of time, all good seeds will settle to the bottom, and bad ones will float to the surface. The upper layer must be removed with a slotted spoon or spoon, and the bottom layer must be carefully caught from the can. It is the settled seeds that will subsequently be planted in the ground.
- The next step is disinfection. This is necessary in order to destroy possible pathogens and fungi so that the crop is healthy. For this, a solution of potassium permanganate has long been used in a proportion of 1 gram of substance per liter of water. For disinfection, you need to keep the seeds in this solution for no more than 20 minutes, since overexposure can reduce germination. In addition to potassium permanganate, ready-made solutions, such as Fitosporin, which can be bought at the same store as seeds, are also currently used.
- Stratification is a rather specific method of seed preparation. The method consists in placing them in winter temperatures. To do this, the seeds must be thoroughly mixed with peat mixture, which is purchased in the store, and then placed in the refrigerator for a month. After that, the seeds are washed and dried.
- Tomato seed growth stimulation - one of the most important steps in preparation. Without this, the plant bushes will be sluggish and frail, and the crop will be scarce. To prepare the stimulant, ash and water are needed. Three teaspoons of ash is taken a glass of water. Insist on a stimulant for at least 24 hours. Then, seeds wrapped in gauze are placed in the mixture for a period of approximately 5 hours. After that, they must be thoroughly dried.

calibration of tomato seeds

Disinfection of tomato seeds in potassium permanganate

Seed stratification

Tomato seed growth stimulation
Soil preparation
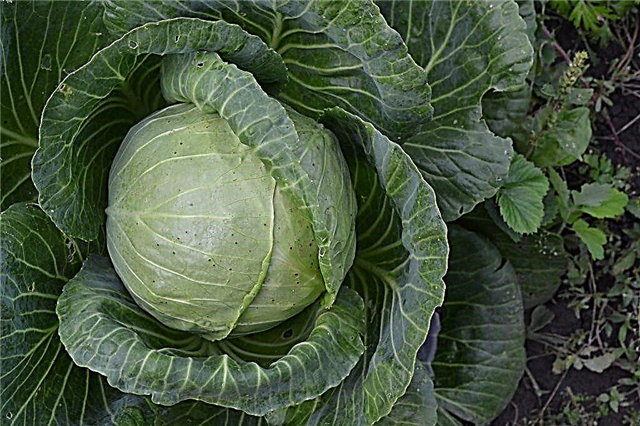
An equally important point is the preparation of land for planting seeds in it. Ideally, this is soil on which other crops have not grown over the past few years, in extreme cases, the use of land after cabbage or zucchini is allowed. The soil after nettle is good. You can use the land from the forest. However, you need to check that there are no residues and seeds of other crops, especially harmful weeds, in it.
Always check the soil carefully for pests. Otherwise, you can lose the entire crop or a significant part of it, and this time and money.
To improve the quality of the soil, you can add ash to it - it is an excellent top dressing, especially for tomatoes. Tomatoes also prefer the growth of soil in which sand is present, as it holds well the moisture they need.
If there is no way to get the right land in natural conditions, you can use the services of a store. In most garden centers, they provide services for the delivery of the desired substrate, which does not contain pests and other crops, and is also fertilized with useful substances.
Seedling tanks
In order for the sprouts to sprout and be ready for subsequent planting in open ground, it is necessary to provide them with a suitable capacity. There are a lot of them and each has its advantages and disadvantages:
- A wooden box is considered a classic capacity for planting seeds. Its advantages are large capacity and convenient transportation. In addition, such a box can be assembled independently, which is quite economical. Among the disadvantages of this method, the weight of the container with the ground can be distinguished - wooden boxes are very heavy. In addition, it is difficult to plant sprouts from it in the open ground - their roots are easily damaged.
- An alternative to the drawer can be considered plastic cassettes - they can reach the same size as the drawers, but have much less weight. In addition, their length can easily be adjusted with a knife or scissors. The disadvantage of cassettes is fragility - they easily break when overloaded with earth, which can damage still unformed sprouts. Also, they are not very convenient to transport from place to place.
- Peat containers are environmentally friendly. They can be either in the form of pots or in the form of tablets. They can be planted immediately in the ground along with seedlings. This is a big plus, since the root system is not damaged. However, due to their natural nature, they are affected by mold, which can damage the sprouts and reduce germination. In addition, it is very difficult to select a watering regime in peat, as it absorbs a lot of water. These containers are one of the most expensive, so not everyone can afford them.
- Ordinary plastic cups, which can be selected by volume, can be considered a cheap analogue. It is very convenient to extract sprouts from them, since the roots are not damaged - this is their plus. The negative side of their use is the need to make drainage holes, this is long enough, especially if there are a lot of seedlings. In addition, they are easily turned over during transportation and can tip over even from a small draft.
- Experienced gardeners use not only the above containers for seedlings. As a budget way, tetrapacks from milk are used. The top is trimmed, and the lower part is used as a container for seedlings. Sour cream cups and plastic buckets after sauerkraut are just as good. The only condition is that you need to wash them well after use to prevent root decay.
- A little-known, but no less good way of doing this is to put seeds in a newspaper. To do this, you need to roll a bag from the newspaper, as for sunflower seeds and cover it with earth, forming a stable bottom. This is the most cost-effective example of a container for seedlings, which also has good air permeability. The disadvantage of this method is rather complicated transportation, since newspaper bags are easily turned over.

How to plant tomatoes for seedlings: step by step instructions
To start planting seeds to obtain sprouts is necessary with soil preparation. To do this, add hot water with potassium permanganate in two days, and add fungicide the next day. This will help prevent root decay.
In order not to mix seedlings in case of planting of several varieties, markings can be applied to pallets, for example, to stick colorful stickers with the names of tomatoes.
Planting seeds itself is not difficult. To do this, place the soil in a pre-selected container, mix with a wooden stick and then level. This is convenient to do with a ruler. After that, in the ground you need to make indentations (grooves) with the same ruler at a distance of no more than three centimeters from each other. The depth of the groove should be at least half a centimeter.
Seeds are planted in these recesses at a distance of 5-10 millimeters from each other, after which they are sprayed with water and covered with earth.
The last step is to cover the future seedlings with polyethylene.
Sprout care
The air temperature in the room should be constant and maintained at a certain level. The optimum temperature for tomatoes is considered to be from 18 to 20 degrees. In such conditions, the first leaves will appear on the third day.
After this, the tomatoes need to be moved closer to the source of illumination - this is how leaflets get sunlight and grow better. Usually there is plenty of natural light, but in the case of winter planting in January-February, you need to provide the tomatoes with artificial lighting.
Daylight hours should be around 16 hours. Do not leave light around the clock, as this can weaken the sprouts.
It is important to maintain a certain level of humidity in the tank. Too much watering will cause the roots to rot, and overdrying will just kill the plant. To prevent this, you must adhere to certain rules:
- In the first week of cultivation, watering is not necessary, there is enough water in the soil from the period of preparation and sowing.
- It is better to use a spray gun for watering - it will gently and accurately provide moisture and will not damage weak sprouts.
- If it is not possible to use a sprayer, you can water it with a watering can, but only near the edge of the container so as not to wash the ground off the sprouts.
- Water should be at room temperature.
Feeding is carried out after the leaves appear. From this moment you need to wait at least a week. For feeding, solutions and mixtures from specialized stores are often used.

After this, watering should be carried out 4 or 5 hours before a dive. This is done to facilitate the process of moving plants. Pickling seedlings of tomatoes is carried out after three weeks from germination of most sprouts, but you need to focus on the condition of the plants.
The picking is carried out in order to provide the young plant with a large amount of soil and to prevent the entanglement of root systems. For the procedure, you need to prepare the soil in the same way as before planting the seeds.
It is necessary to extract the plant from moist soil so that the roots are not damaged by lumps of dry earth. You need to place it in a separate container. The use of individual cups is ideal. The sprout should be planted carefully, carefully immersing the roots and part of the stem in the ground. Gently crush the earth around the plant with your fingers and water it to remove voids.
After the manipulations, the transplanted sprout is left alone for several days in a warm and dark place. This is necessary so that he better takes root in the new tank.
After 3 or 4 days, the seedlings return to a bright place. During this period, you need to regularly water the plants, loosen the soil in containers, and feed the tomatoes with special solutions for fast growth.
We also recommend that you familiarize yourself with the recommendations that will help grow strong and healthy tomato seedlings here.
What should be the seedlings before planting?
In order for the planting to be successful, it is necessary to develop a powerful root system in seedlings. With proper care, this occurs after 60-90 days from the planting of seeds in the soil. For each grade it is individual.
Before planting, the plant must be prepared so that it does not die from unusual conditions. To do this, seedlings need to be taken out into the open air a week after the dive. Time must be increased gradually, starting from half an hour and ending with whole days.
Let's watch a video on how to sow tomato seeds for seedlings. We learn how to create the necessary conditions for the growth of tomato seedlings, and how to properly care for planted seedlings:
In order for the result in the form of a good crop to please the eye, you need to follow the simple rules and instructions described above, and then everything will turn out, the tomatoes will be tasty and juicy, and their amount will pay off all the energy invested in them.